In this article we will explore an easy-to-use development framework for STM32 microcontrollers. The purpose of this framework is to speed up the development of STM32 projects and help the user focus mostly on their application, rather than the configuration. This framework is consisted by a series of plug-n-play modules covering a wide number of peripherals and libraries. Ex: CANBus, UART, SPI, EEPROM, Queues, ISO14229 etc..)
Please use the following repository to view all the available modules: devcoons/stm32-devcoons-framework (github.com)
Starting with the most basics (but important), in this step we will create our stm32 project and ensure that some configurations are applied correctly to allow the “stm32 devcoons framework” run. For this example, we will use the STM32-H743 Nucleo board (of course you can use another nucleo or a custom board as well)
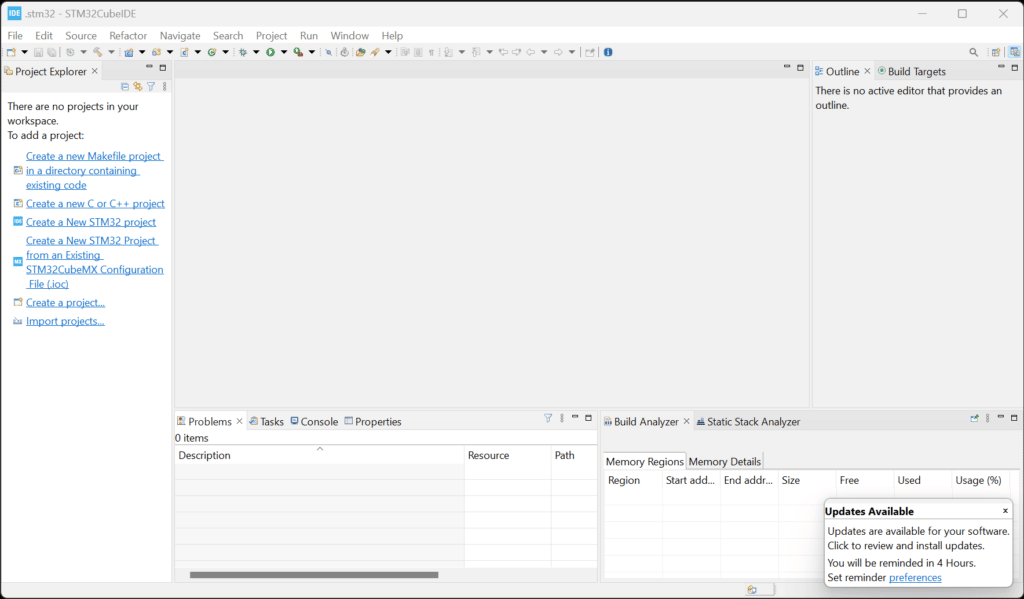
- Open the STM32CubeIDE and “Create a New STM32 Project”
- Open the “Device Configuration Tool” and navigate to “Project Manager”
- Enable FreeRTOS and configure a core task for the framework
- Create the ‘basic’ folder structure
- Add Folder(s) in the GCC Compiler ‘Include paths’
- Add the framework core submodule ‘stm32-definitions’
As long as this framework is using the git submodules functionality, please make sure you are working in a GIT Repository
Open the STM32CubeIDE and “Create a New STM32 Project”
Open the “Device Configuration Tool” and navigate to “Project Manager”
In this step, it is IMPORTANT to enable the “Generate peripheral initialization as a pair of .c/.h files per peripheral”, under the Code Generator. Afterwards, save the allow the code generator to perform the changes.

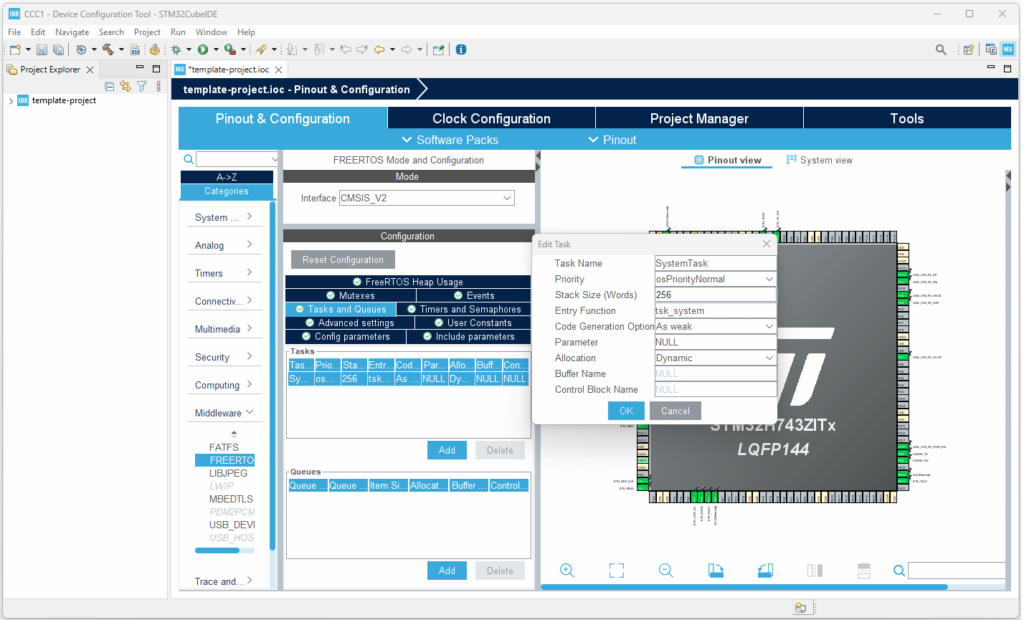
Enable FreeRTOS and configure a core task for the framework
STM32 Devcoons Framework works best with FreeRTOS enabled. So, it is important to enable the FreeRTOS in our project. Moreover, to automatically link the core task of the framework tsk_system, we will create a new task (as it is presented below) with the following configuration:
- Entry Function: tsk_system
- Code Generation Option: Weak
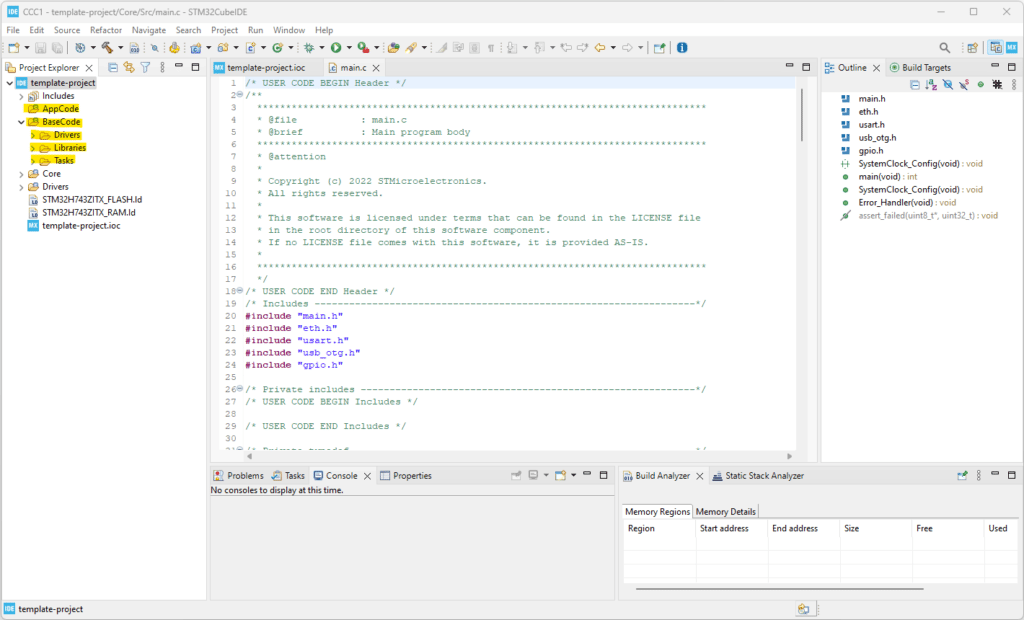
Create the ‘basic’ folder structure
One of the most important parts of this framework is the folder structure. To avoid having everything together (generated code + our code), we will create two main folders AppCode and BaseCode. (We will discuss later on what goes where). Afterwards, in the BaseCode we will create 3 more folders, Drivers, Libraries and Tasks. Long story short, check the following screenshot:
IMPORTANT: The AppCode and the BaseCode should be Source Folders and the rest just normal folders
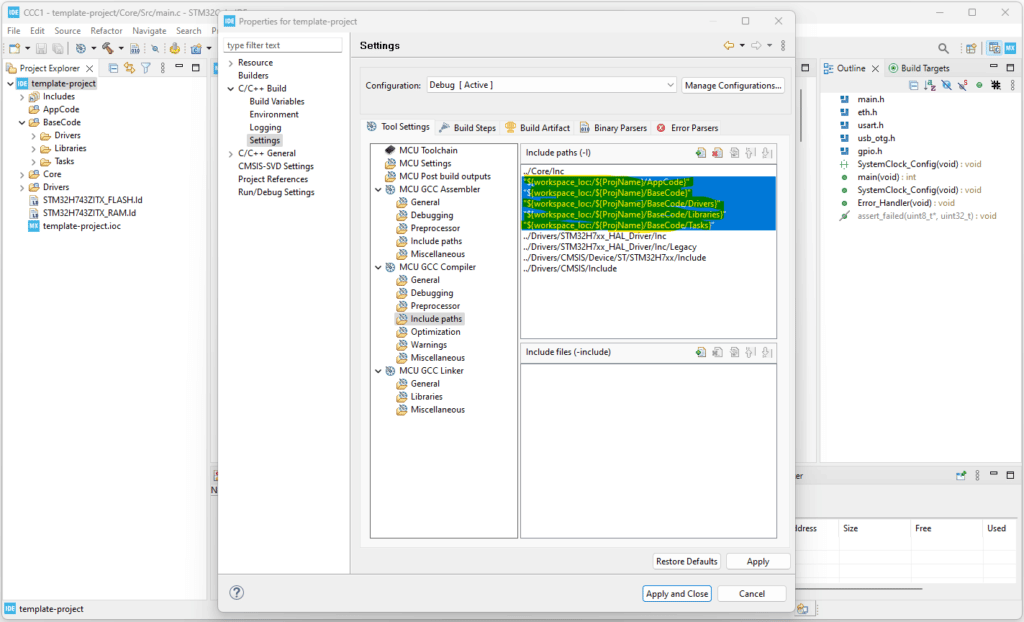
Add Folder(s) in the GCC Compiler ‘Include paths’
To complete the step 3, we MUST include those folders in the “GCC Compiler Include paths” as presented below:
Add the framework core submodule ‘stm32-definitions’
This is the most ‘difficult’ step due to the initial copy paste of files and some minor modifications in the /Core/Src/main.c file. However, afterwards there will be no need to perform any extra modification in the /Core folder. So let’s start!
Open a Console in the /BaseCode/ folder and add the stm32-definitions as a submodule.
git submodule add https://github.com/devcoons/stm32-definitions _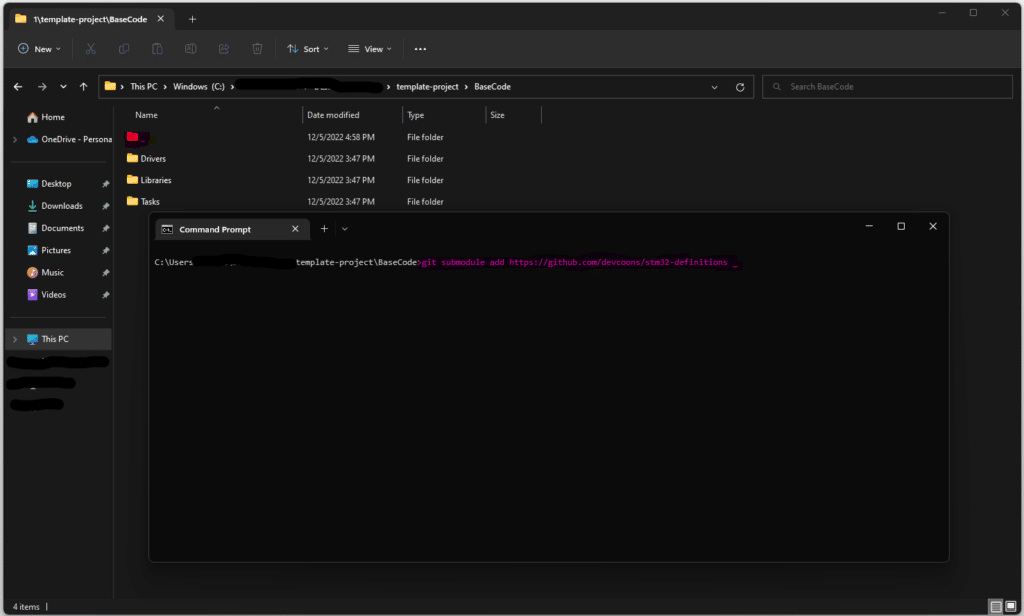
IMPORTANT: Before you proceed, perform the Step 5 - Add Folder(s) in the GCC Compiler 'Include paths' also for this new folder /BaseCode/_
By checking what we added as a submodule in the /BaseCode/_ folder, we will see some .template files. Usually whenever we see those files, we have to somehow use them. For the stm32-definitions we have to move: (remove the .template extension)
- The
user_code.h/cfiles in the/BaseCode/folder - The
basecode_tsks.hfile in the/BaseCode/Tasks/folder - The
tsk_system.cfile in the/BaseCode/Tasks/folder - The
tsk_app.h/cfiles in the/AppCode/folder - The
appcode_tsks.hfile in the/AppCode/folder

Now, to link the framework to the project we have to do a one-time modification in the /Core/Src/main.c file. For simplicity, please copy-paste the following snippets in the correct USER CODE sections:
Include the user_code.h header file
/* Private includes ----------------------------------------------------------*/
/* USER CODE BEGIN Includes */
#include "user_code.h"
/* USER CODE END Includes */
Set the following variables (to be used for moving the vectors table in RAM)
/* USER CODE BEGIN 0 */

static uint32_t vectorTable_RAM[256] __attribute__(( aligned(0x400ul) ));
extern uint32_t g_pfnVectors[];

/* USER CODE END 0 */
Set the vector’s table in RAM
  /* USER CODE BEGIN 1 */
	__disable_irq();
	uint32_t i = 0;
	for (i = 0; i < 256; i++){
		vectorTable_RAM[i] = g_pfnVectors[i];
		__ISB();
		__DSB();
	}
	SCB->VTOR = (uint32_t)&vectorTable_RAM;
	__DSB();
  /* USER CODE END 1 */
Enable the IRQ (after moving the vectors table)
  /* USER CODE BEGIN Init */
  __enable_irq();
  /* USER CODE END Init */
Start our system init function (+experiment functions)
  /* USER CODE BEGIN 2 */

  user_code_experiment_pre();
  user_code_initialize();
  user_code_experiment_post();

  /* USER CODE END 2 */
Let’s test our base system!
That’s all folks! Now your project is ready to use any of the modules we mentioned in the introduction. If you run-by-debug, you will see the following function calls order:
- user_code_experiment_pre
- user_code_initialize
- user_code_experiment_post
- Looping in the tsk_system function (FreeRTOS task)
How to add a module:

https://devcoons.com/stm32-devcoons-framework-add-a-module-2/
In the next post we will start adding some modules and check how we can use them easily.
Stay tuned!!!
Check the following posts:

- lib-crypto: https://devcoons.com/stm32-devcoons-framework-2-add-lib_crypto-module/