The flow to add a module in the STM32 Devcoons Framework is a straightforward and seamless process which ease up the development. In this post, we will see the basic rules we have to follow and show a quick example.
Place the modules in the corresponding folder
Any module should be placed in the corresponding folder under the /BaseCode/.
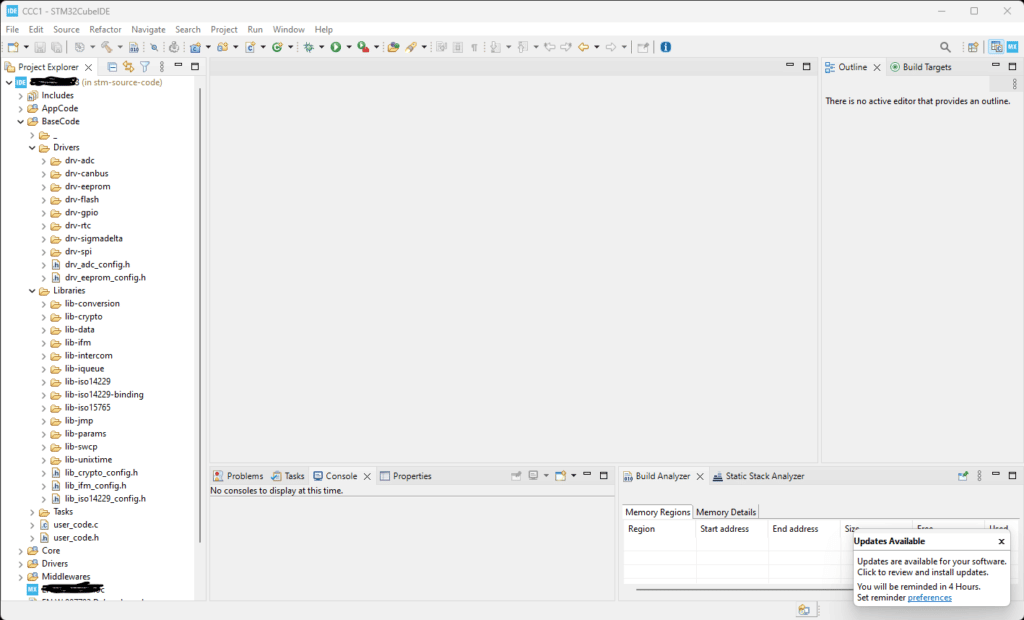
All the modules start with either drv or lib prefix indicating the proper subfolder that they need to reside. For example, the module drv-canbus should be added as a git submodule in the /BaseCode/Drivers/ as well as the module lib-crypto should be added under the /BaseCode/Libraries/ path. Take a look of the following screenshot which explains better this convention.
Add a module
1. Using the github url, add the submodule under the correct folder using the following command.
git submodule add <url> <folder_name>
A good tactic is to use a folder name similar to the module name for example:
> git submodule add https://github.com/devcoons/stm32-drv-flash drv-flashLe’ts try to do this with the lib-crypto, As a first step, we need to add the library (as a git submodule) into our project. Due to the fact that this is a ‘library’ we should add in under the folder /BaseCode/Libraries/ like the screenshot below.
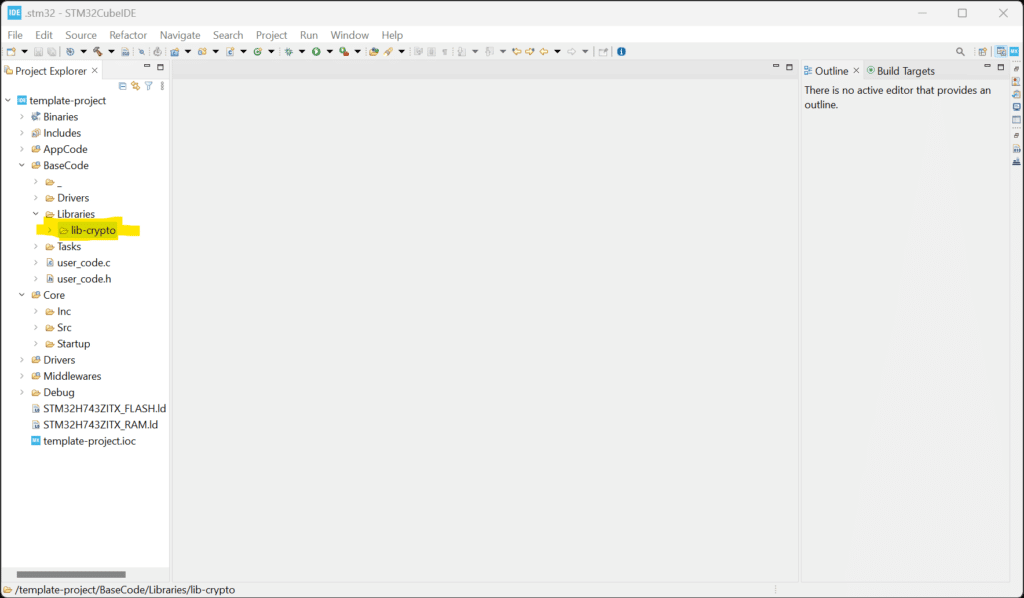
To add this module, we navigate to the /BaseCode/Libraries/ and we run the following command in the terminal:
git submodule add https://github.com/devcoons/stm32-lib-crypto lib-crypto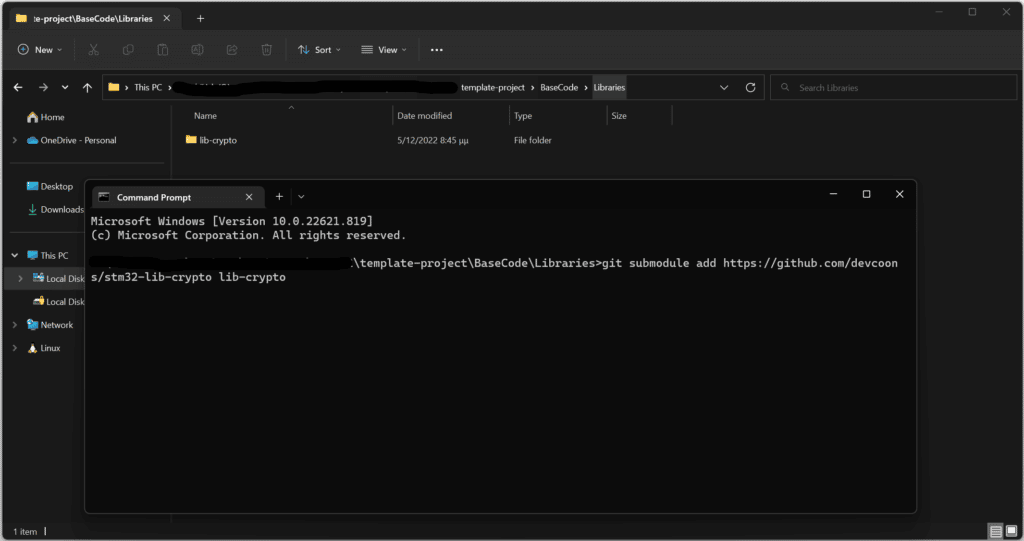
Include the path in the ‘GCC Include Paths’
TO ensure that the GCC is able to identify the module, you have to include it in the MCU GCC Compiler > Include paths as presented in the screenshot below:
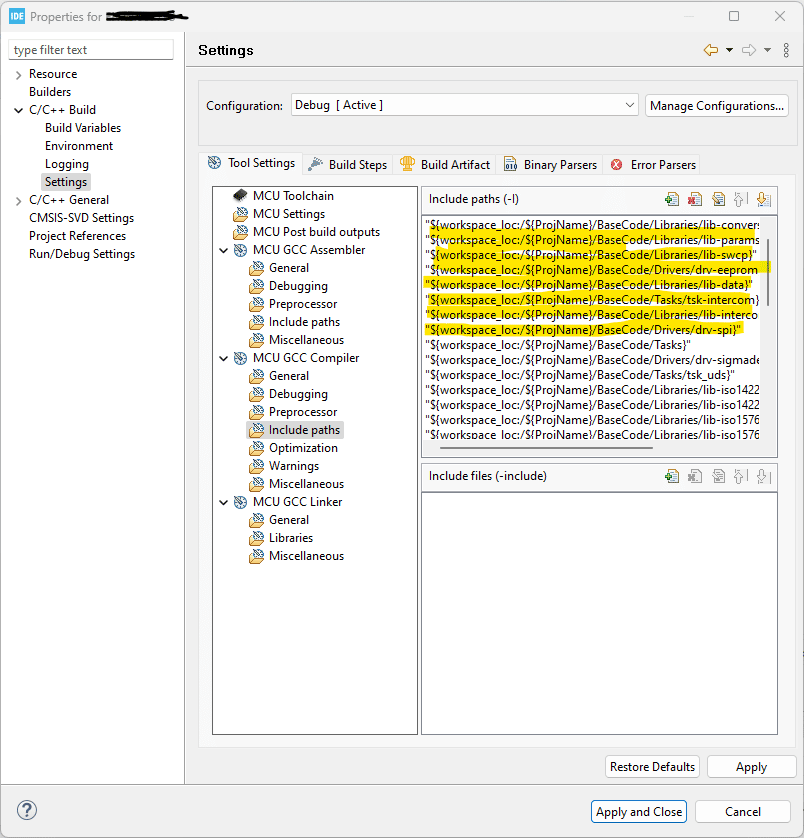
Resuming the example with the lib-crypto, we will add the path in the GCC compiler include paths as presented below:
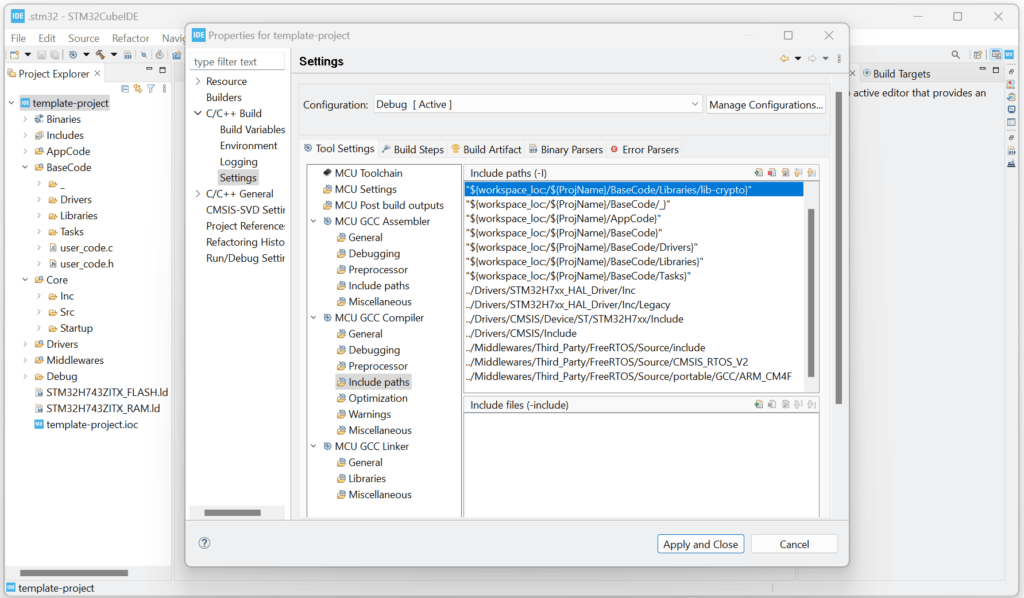
That’s all! Now you can freely use the module in your code!
Each module may require some extra steps, for example it may needs to place a configuration file to enable some features etc. Please always check if there are any .template or .example files


